Sunday, September 22, 2013

Teaching Students How to SHOW not TELL in Writing

I was scared. I felt sad. I was really happy. Do these sentences sound familiar to you? These are the types of sentences my students were writing a couple of weeks ago when explaining how they were feeling in their writing. Now they are writing sentences such as, "My heart started pounding and my palms were sweaty." and "I jumped backwards and threw my arms up in the air!" Their writing is so much more interesting and they are really showing how they were feeling instead of just telling it.

So how did my third graders make this jump in their writing? Meet my newest unit, Now Showing... {A Unit on Showing not Telling in Writing}


To start off the unit, I showed my kids examples of telling and showing sentences. I asked them which type of sentence was more interesting to read. They all agreed that the showing sentences were more interesting. I then explained that over the next week or two, I was going to teach them how to show not tell feelings in their own writing.

The first activity that I did with my students is called "Feelings Charades." My students LOVED this activity and it really showed them how to describe a feeling in detail rather than just telling it.
Volunteers in our class acted out different feelings while the rest of the class recorded the body language/actions that they noticed (eg. hanging head, shuffling feet, shoulders hunched, etc.) This game helped my students understand how to "show not tell" a feeling in their writing. They loved acting out the feelings and were begging to do more than the six feelings I had planned.


After we finished the activity, I gave each student a "Showing Feelings Chart" to add to their writing binder. I explained that they could use this chart as a resource throughout the year if they needed help with showing a feeling. There are twelve different feelings explained on the chart.


Later in the week, I read many Patricia Polacco books to my students and had them listen for examples of "showing not telling." Patricia Polacco has many examples in one book alone. For example, in Chicken Sunday, there are 8 examples of a feeling being shown not told. Each of my students were assigned a different feeling before I read the book (different feelings were typed on cars and passed out to each student). While I was reading, they had to listen for an example of that feeling being shown. If they heard an example, they held up their card and we stopped the story to discuss how Polacco had described it. I love using mentor texts in writing workshop and Polacco's books are always so enjoyable for the students. Three of the books that I used in this unit are:


For each read aloud, I've included a chart of the "showing not feeling" examples and the page numbers that they can be found on. Also included in the unit are a brainstorming list, practice pages for students to turn telling sentences into showing sentences, and a recording sheet for students to write down showing sentences that they find while reading on their own. If you'd like to check out my unit on TpT, just click the image below!

Thursday, September 12, 2013

My Classroom Tour... Finally!

I am so excited to share my classroom this year with all of you! Since I am looping with my second graders from last year, I wanted to change up my classroom theme a little bit but didn't want to start completely over again. I spent a ton of time sewing and creating things for my room last year and couldn't bear the thought of not using it.

I came across Schoolgirl Style's Road Trip theme classroom décor set and knew that it would be a perfect fit for my third graders. A little more mature but still fun and colorful! I love the way it turned out =) Here are some pics from my new classroom...

 
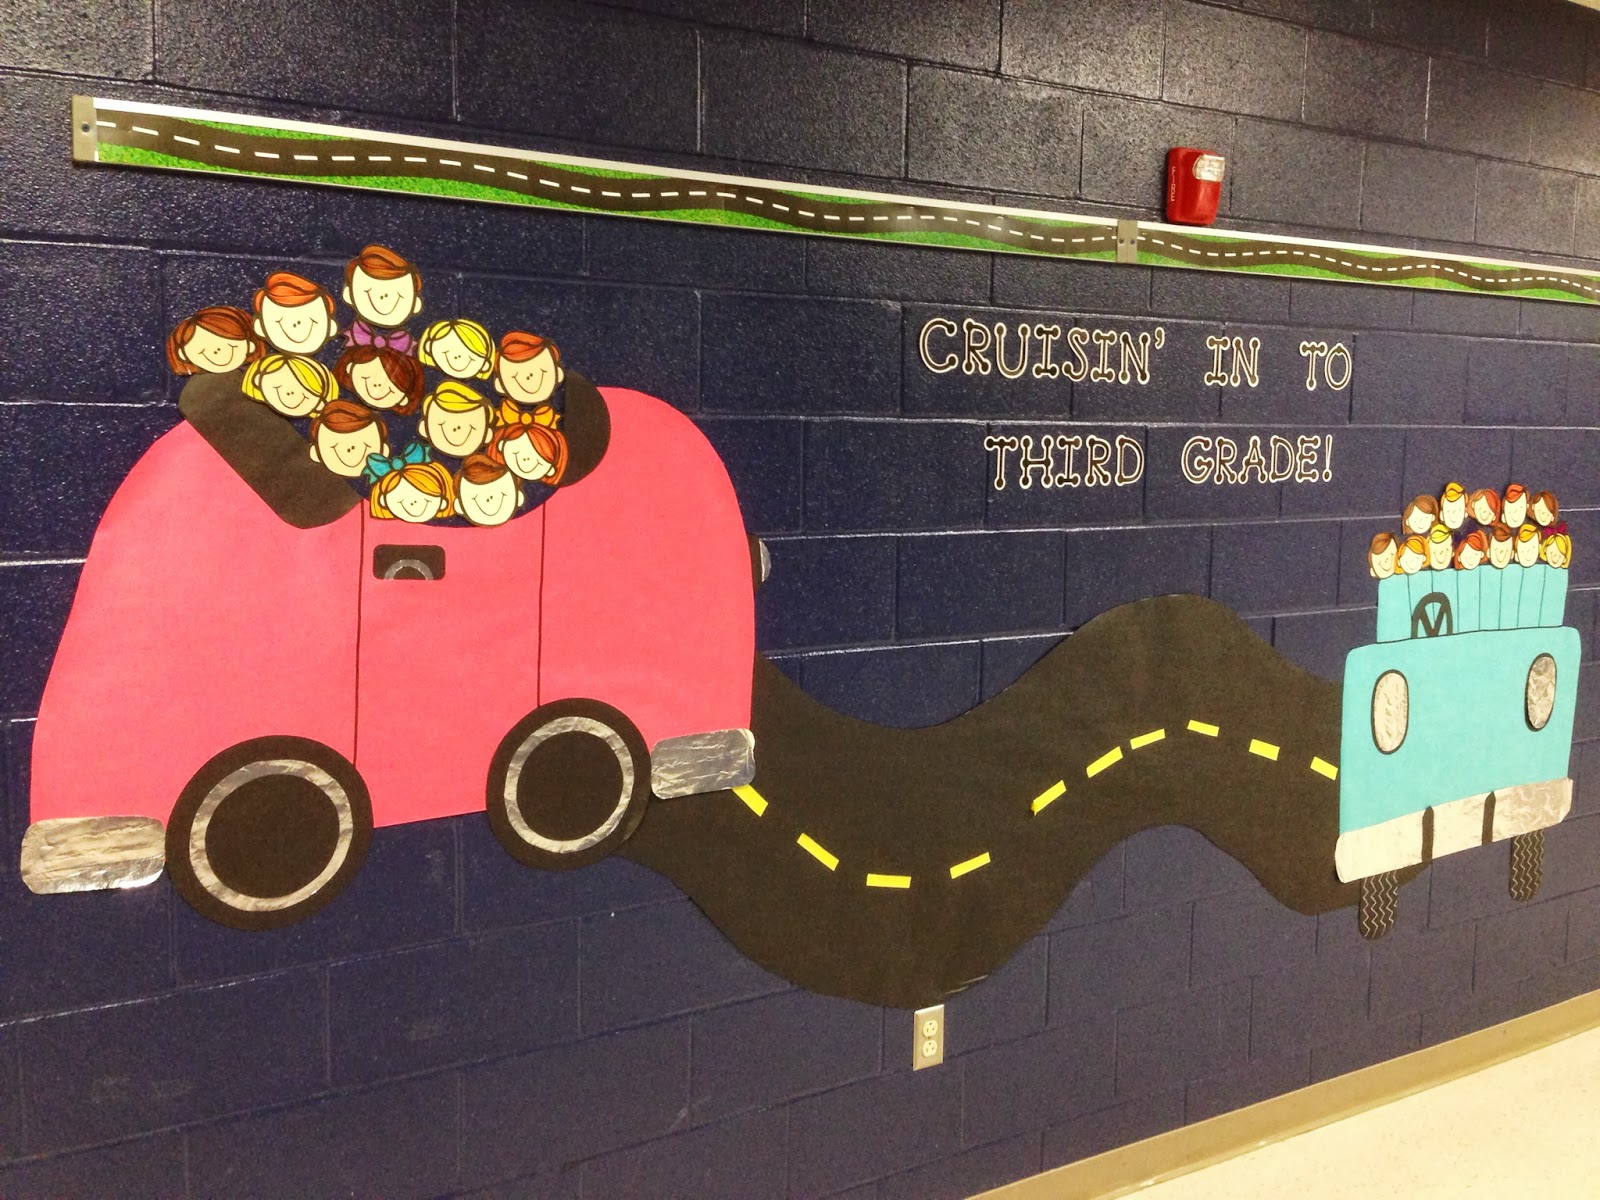
In the hallway leading to my classroom door, I wanted a fun welcome message for my kids. I saw this idea on Pinterest {here} and fell in love with the hallway display! The cars were actually very easy to make and Melonheadz had the cutest faces clipart that I used for the little third graders in the cars!


Don't you just love pennants?! This welcome pennant is hanging right inside my classroom door.


I have this funky little corridor right inside my classroom door and wasn't quite sure what to do with it. Since I have a massive hallway display (the cute little cars) I decided that I needed a space to display my students' work. I used ribbon, mini clothespins, laminated sheets of black paper, and road trip nametags to make this display. It is so easy to change out student work using the clothespins!


Here is a close up of one of the student work displays. (Please don't mind my reflection in the paper!)


This is the area where I display our daily "I can" statements and anchor charts. I stole the idea for the magnetic curtain rods from Christina at Second Grade Sugar and Spice. It has worked for me very well so far! I'm always looking for more space to hang anchor charts and this idea was perfect!


This year, I'm using a vocab wall instead of a word wall. Each week, I introduce the new vocabulary terms as we learn them and add them to the wall. I refer to the words throughout the week and the kids use them for their vocabulary homework. To make the display, I just used ribbon and Velcro. The Velcro makes it really easy to change out the words each week.


Here is a close up of the vocabulary cards. Each card has the term, definition, and illustration of the word.


I wanted to keep the lanterns that I used in my classroom last year, but wanted to put a new twist on them. In Schoolgirl Style's décor set, there are postcards from all 50 of the states. I decided to name each table a different state using the postcards. My kiddos LOVE being called to the carpet by their state!


Okay, I have to admit something here- I went a little crazy over the summer buying chapter books for my classroom! With the transition to third grade (and the fact that most of my students have already read the majority of my books), I figured I needed to add many more chapter books. I found these amazing bins on Really Good Stuff and filled them up in no time!


Each student has their own chair pocket this year where they store their data notebooks. On each pocket, I put a license plate with the student's name. They are attached to the chair pockets with Velcro so I can easily switch them out!


Here is our "Road Trip Through the Writing Process" bulletin board! My students always seem to think that once they write their draft in writing workshop, they are done. Does anyone else hear me on this?! I thought my kiddos could use a visual reminder of the ENTIRE process!


This is our student computer center. Nothing fancy, but my students LOVE when it is their day on the computer!


I HATE clutter. So last year, I made this curtain to cover up the last few cubbies that I wasn't using. Behind the curtain, there is stuff shoved everywhere! With very limited storage space, I have to hide things anywhere I can!


Okay, can I just tell you that I am in love with this 5 drawer organizer? One of my biggest issues last year was trying to manage my turn-in basket. It would get so full with papers all mixed up and out of order. This organizer from Really Good Stuff is FABULOUS. Each drawer has a different label (morning work, math, word study, reading, and other). It has really helped me stay on top of grading papers. I couldn't live without this thing!

Alright, you made it to the end of my tour! I hope you enjoyed checking out my classroom!

Monday, August 19, 2013

Take a Peek at My Back to School Sale Purchases! {A Linky Party}


Wow! I just now realized how long it has been since I've posted on this little ole' blog. Between switching grade levels, chasing around a 2 year old, and being 20 weeks pregnant, I decided to take a break from blogging for the summer and try to enjoy all of the new changes in my life! I'm happy to say that I'm back and can't wait to share all about my year in THIRD grade!

This year, I am looping with my second graders from last year and I couldn't be more excited. I had such a fabulous group of kiddos last year and I get to keep them for another year! I usually get so nervous for Meet the Teacher night but last week when we had ours, it felt like a family reunion! It was great to see all of my kids and hear about their summers.

Since I'm switching grade levels, I am in need of a lot of third grade resources. So what did I do? Went a little crazy shopping at the TpT Back to School sale! I wanted to share some of my finds with you and I hope that you link up and share yours too! Here's what I snagged:


This year, I'm using a vocabulary wall to help reinforce all of the new vocabulary terms that we learn in third grade. I've already created math vocabulary cards but just didn't have the time or energy to create the cards for ELA. I went searching on TpT and found this fabulous resource! These cards are going to look great on my vocab wall.


This will be my first year using interactive notebooks in the classroom and I am so excited! Nicole has put a TON of hard work into these notebooks- they are over 100 pages each! I think my students will really like keeping track of everything they are learning in these notebooks. Plus, it will be a great resource for them to refer to throughout the year.
 
Math Camp-In Grades 3&4 by Math & Science with TLC

 
I can't believe I haven't discovered this wonderful store until now. If you are looking for Math and Science resources, Math & Science with TLC is the place to go! I'm always looking for ways to make math fun and exciting, and what better way than a Math Camp-In! During a Math Camp-In students hike to math "trail posts" (stations), complete rich mathematical tasks and record ideas in their Camp Journal. The Math Camp-In can be used as a day-long program, a mini-unit in the regular classroom, or as a Family Math Night. How fun!


We've had a lot of training recently about the 8 Mathematical Practices. When I saw this poster set, I knew I had to have it! (Plus, the kid-friendly language on each poster helps ME understand the meaning of each mathematical practice!!)


This product is another great resource for using the 8 Mathematical Practices in the classroom. It includes 18 cubes with questions for your students to answer before, during, and after problem solving. These cubes will help give me the language needed to ask open-ended questions in math!


Okay, I'm a little embarrassed to admit that these task cards are the first that I've purchased from Rachel Lynette. I'm so excited to try them out in the classroom! Understanding shades of meaning is such a tricky thing to teach so these should be a huge help.

Whew.... I think that's it! Link up below and share your goodies from the Back to School sale! I just might have to shop a little more before the sale ends tonight =)


Monday, May 6, 2013

TpT Teacher Appreciation Sale.... It's Almost Here!!!


Happy Teacher Appreciation Week! To show you how much I appreciate your support of my blog and TpT store, I am offering 20% off of ALL products in my TpT store for the big sale! From May 7th through Ma 8th, you can save 28% off by using the discount code TAD 13 at checkout. This is a great time to stock up on end of the year items as well as back to school products for next year! My wish list is full and I can hardly wait to snag all of the goodies that I have been eyeing lately!

Here are some recent additions to my TpT store:


These posters include "I can" statement posters for ALL Common Core standards along with Science and Social Studies posters specific to your state. If you're anything like me, you'll love having a matching set of posters for all subject areas!


This is a cute and easy craft for your students to make for Mother's Day! Three different message boxes, patterns, and directions are included.


Celebrate the end of the year with your students using this fun rockstar themed memory book! There are two different versions provided- one features girl rockstars and one features boy rockstars. This book is printed like a booklet and will save you on paper! Just print double sided, fold in half, and staple in the middle.
 
 
I hope you enjoy the big sale tomorrow and Wednesday! Happy Teacher Appreciation Week!