Showing posts with label classroom displays. Show all posts

Thursday, September 12, 2013

My Classroom Tour... Finally!

I am so excited to share my classroom this year with all of you! Since I am looping with my second graders from last year, I wanted to change up my classroom theme a little bit but didn't want to start completely over again. I spent a ton of time sewing and creating things for my room last year and couldn't bear the thought of not using it.

I came across Schoolgirl Style's Road Trip theme classroom décor set and knew that it would be a perfect fit for my third graders. A little more mature but still fun and colorful! I love the way it turned out =) Here are some pics from my new classroom...

 
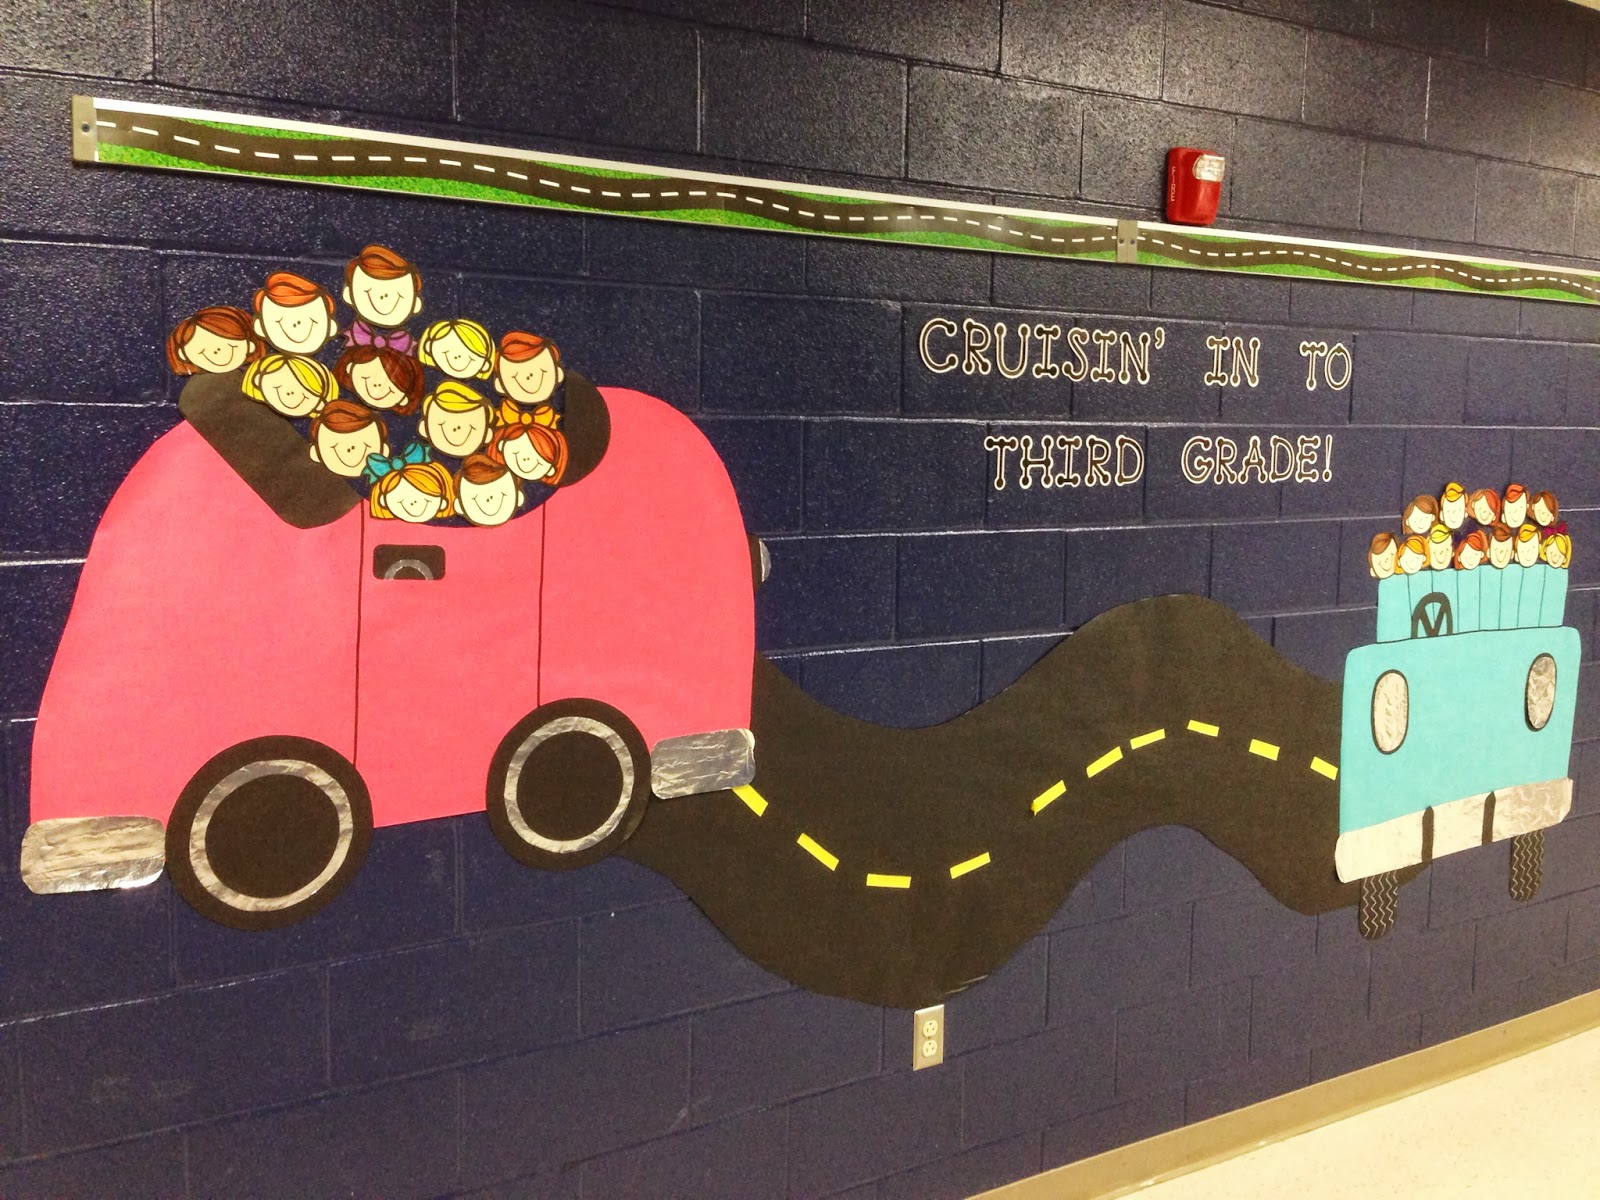
In the hallway leading to my classroom door, I wanted a fun welcome message for my kids. I saw this idea on Pinterest {here} and fell in love with the hallway display! The cars were actually very easy to make and Melonheadz had the cutest faces clipart that I used for the little third graders in the cars!


Don't you just love pennants?! This welcome pennant is hanging right inside my classroom door.


I have this funky little corridor right inside my classroom door and wasn't quite sure what to do with it. Since I have a massive hallway display (the cute little cars) I decided that I needed a space to display my students' work. I used ribbon, mini clothespins, laminated sheets of black paper, and road trip nametags to make this display. It is so easy to change out student work using the clothespins!


Here is a close up of one of the student work displays. (Please don't mind my reflection in the paper!)


This is the area where I display our daily "I can" statements and anchor charts. I stole the idea for the magnetic curtain rods from Christina at Second Grade Sugar and Spice. It has worked for me very well so far! I'm always looking for more space to hang anchor charts and this idea was perfect!


This year, I'm using a vocab wall instead of a word wall. Each week, I introduce the new vocabulary terms as we learn them and add them to the wall. I refer to the words throughout the week and the kids use them for their vocabulary homework. To make the display, I just used ribbon and Velcro. The Velcro makes it really easy to change out the words each week.


Here is a close up of the vocabulary cards. Each card has the term, definition, and illustration of the word.


I wanted to keep the lanterns that I used in my classroom last year, but wanted to put a new twist on them. In Schoolgirl Style's décor set, there are postcards from all 50 of the states. I decided to name each table a different state using the postcards. My kiddos LOVE being called to the carpet by their state!


Okay, I have to admit something here- I went a little crazy over the summer buying chapter books for my classroom! With the transition to third grade (and the fact that most of my students have already read the majority of my books), I figured I needed to add many more chapter books. I found these amazing bins on Really Good Stuff and filled them up in no time!


Each student has their own chair pocket this year where they store their data notebooks. On each pocket, I put a license plate with the student's name. They are attached to the chair pockets with Velcro so I can easily switch them out!


Here is our "Road Trip Through the Writing Process" bulletin board! My students always seem to think that once they write their draft in writing workshop, they are done. Does anyone else hear me on this?! I thought my kiddos could use a visual reminder of the ENTIRE process!


This is our student computer center. Nothing fancy, but my students LOVE when it is their day on the computer!


I HATE clutter. So last year, I made this curtain to cover up the last few cubbies that I wasn't using. Behind the curtain, there is stuff shoved everywhere! With very limited storage space, I have to hide things anywhere I can!


Okay, can I just tell you that I am in love with this 5 drawer organizer? One of my biggest issues last year was trying to manage my turn-in basket. It would get so full with papers all mixed up and out of order. This organizer from Really Good Stuff is FABULOUS. Each drawer has a different label (morning work, math, word study, reading, and other). It has really helped me stay on top of grading papers. I couldn't live without this thing!

Alright, you made it to the end of my tour! I hope you enjoyed checking out my classroom!

Sunday, September 30, 2012

New Blog Design and Other Fun Stuff!

I am sooo excited about my new blog design! I was looking for something unique for my blog and came across Sour Apple Designs's DIY. I was thrilled to be able to design my own blog! It was fun, fast, and super easy to do. The hardest part was choosing all of the colors, fonts, and designs. What do you all think?! I still need to tweak a few things, but it's close to being finished. If you're interested in designing your own blog, I highly recommend this website. Click on the image below to learn more about it!

 
On to other fun things... I have some new products that I am excited to share with you! First up is the classroom timeline that I created to replace the one I used last year that was totally falling apart. I have this hanging in my classroom and as we learn about different events from history, we add the event card to the timeline. The kids love doing this! This kit includes includes:
 
*Timeline (starts at 1800 and ends at 2030)

*Directions for making the classroom timeline

*18 event cards that include dates for: George Washington, Harriet Tubman, Abraham Lincoln, Alexander Graham Bell, the Washington Monument, Susan B. Anthony, Eleanor Roosevelt, Martin Luther King Jr., Neil Armstrong, Benjamin Franklin, Sojourner Truth, Thomas Edison, George Washington Carver, Helen Keller, the Lincoln Memorial, the Jefferson Memorial, Rosa Parks, and Barack Obama

Each event card has the date, name, and brief description of the event. Here is a picture of the timeline in my classroom:
 
 
It is a little bare right now, but will look more complete as we add events throughout the year. To learn more about this item, click on the picture below!
 
 
I also just completed a mini-unit on Christopher Columbus to celebrate Columbus Day on Monday, October 8th! This unit is packed full of meaningful activities to use on Columbus Day. Reading, writing, phonics, and math activities are all included. In this packet, you will find: a recommended book list, an original book titled "All About Christopher Columbus: A Biography of the Famous Explorer" (This book is written in kid-friendly language that your students will be able to understand!), an acrostic poem template, a character map of Christopher Columbus, ABC order practice, number stories that include true information about the explorer, and a R.A.F.T. writing activity (your students will pretend to be Christopher Columbus and write a letter to a family member explaining the voyage). Click on the image below to check it out!
 
 
Last, but not least, this week I am planning on teaching my students how to make predictions. I think it's so important for students to make predictions while they read, but equally important is explaining the thinking behind their prediction. Using evidence from the book to support their prediction is crucial. Otherwise students make wacky predictions without really thinking about the story. Tomorrow, I plan to read the book For the Love of Autumn by Patricia Polacco and fill out this chart with students' predictions during the story. I also plan to model my own predictions and use plenty of think alouds to explain how I made my predictions. I always tell my students "Reading is THINKING!"


Well I hope you all had a wonderful weekend! I am loving this fall weather and spending time with my little family. Here is a pic of my son, Grady, and I at the apple orchard this weekend. We had so much fun! Have a great week =)


Saturday, August 4, 2012

My New and Improved Word Wall!

This year, I decided to revamp the word wall in my classroom. I wish I had a before picture, but I never took one last year. Basically, I used LONG pieces of butcher paper  to create a large rectangle on the wall. This thing was probably 12' x 6'. It was a pain to hang up because you had to have at least 2 people hold the paper up and it took forever to add border to the perimeter. Last year, I would come into school in the morning to see that the entire top half of my word wall had come off the wall.

My awesome teammate, Kristin, used a completely different word wall in her classroom so I decided to create one like hers for this year. First, I bought a pack of 12"x12" scrapbook paper with colors that went with my classroom. Then, I cut the papers to be 8.5"x11" so I could print on them. I made a document on the computer that just had a large rectangle on the bottom half of the sheet. I printed the rectangles on the paper and then used punch-out letters to make the letters at the top. Last, I laminated and hung them up on the wall. Seriously, it took me about 10 minutes to hang the whole thing compared to about an hour that my old one did! In case you're wondering what the rectangle is for, I'm going to have my students draw a picture of a word that starts with each letter and then I will hang the picture in the rectangle. Here's a picture of my completed project:


As far as adding new words to the word wall, we have 5 sight words that we practice each week. I print these words on cards, hang them up on our front whiteboard, and we do several activities each week to practice them. Once the week is over, I add the 5 words to the word wall and then we start with 5 more the next week. One of the activities my students do to practice these words is use their whiteboards for about 10 minutes each day for our word wall routine. Here's how it goes:

1. The "word wall helper" (this is a student job in our classroom) leads the class at the front of the whiteboard with a pointer stick. Everyone else sits on the carpet with their own individual whiteboard, dry erase marker, and a sock (we use these as erasers!).
2. The word wall helper points to the word and the students SAY-SPELL-SAY-VISUALIZE-WRITE-CHECK.
3. First, they say the word aloud, spell it, and say it again.
4. Next, they visualize the word. They can do this 3 different ways but all 3 ways have to be done without talking. They can "air write" the word which means they use their finger to write the word in the air. They can "brain write" which means they close their eyes and visualize the word over and over in their head. Or they can "hand write" which means they use a finger to write the word over and over again on the palm of their hand. This only lasts for about one minute.
5. The next step is that the kids write the word on their whiteboard.
6. Last, the word wall helper spells the word aloud and everyone checks to make sure that they spelled it correctly. Once they've checked, they erase and we go onto the next word.

I know this probably sounds like it take forever, but once the students learn the routine, it only take about 10 minutes start to finish. It incorporates all types of learning styles- students hear the word, write it, trace it in the air, etc. I've had great success with my students learning their sight words and I know that this activity greatly helps! Plus, the kids LOVE being the word wall helper for the week. They get so excited to use the pointer stick and act like the teacher!

What are some fun ways that you have your students practice their sight words?


Thursday, August 2, 2012

How To Create a Cozy Classroom {and a Sneak Peek!}


Creating a classroom where students feel safe, comfortable, and valued is so important to me. I also want my classroom to be cozy, because it is really their "home away from home" for about 10 months out of the school year! Over the past couple of weeks, I've been working in my classroom a little bit at a time and I thought I'd share some ideas for how to create a cozy classroom!


1. Curtains- Curtains make a classroom feel very homey. You can do either short or long curtains. Every year up until this year, I've done short curtains at the top of my windows. This year, I decided to try something different! I bought long red curtains at Wal-Mart, cut them off and sewed them so they were the right height and then added a polka dot tie-back. I love how they turned out! Curtains are such an easy way to change your classroom feel.


2. Chair Pockets- Adding chair pockets to your classroom provides color and functionality. These are very simple to make! I made 12 total for my classroom: 6 for my guided reading table, 3 for computer center, and 3 for writing center. These pockets will be used to hold activities for each center and books/reading response folders during guided reading. There are great tutorials all over the web for how to make these. I just made up my own as I went!


3. Classroom Rug- Adding a rug to your classroom is not only colorful and cozy, but it is also beneficial so that students know where your meeting area is. You can purchase large rugs at Wal-Mart, Target, or any other store that sells home decor items. I was lucky enough to have this amazing rug donated from some generous donors on DonorsChoose.org. If you don't know about this organization, you need to check it out {here}!


4. Paper Lanterns- I was so inspired by Schoolgirl Style when I saw these adorable paper lanterns on her website. These add a bit of whimsy to the classroom! I used matching ribbon to tie a bow at the top and then hung a table number below each lantern.


5. Ribbon- Speaking of ribbon, here are a couple of ways that I incorporate ribbon into my classroom. The picture on the left is a trash can that sits on top of each table. I found these adorable buckets at Garden Ridge. I used the same ribbon that is on the paper lanterns and tied a bow around the middle. The picture on the right is my calendar area. Using fun ribbon is a great way to hang pocket charts, posters, or anything else that you can think of! I used the green polka dot ribbon to hang my calendar and my Common Core posters.


 6. Wooden Bookshelves- I found this cute little bookshelf at a garage sale a few summers ago. It was in pretty bad shape but I knew it had potential! I painted it red and use it for my students' check-in area. They clip in here and also get their lunch envelopes from the baskets. Garage sales are great places to find cheap bookshelves that can be painted to match your classroom!


7. Pillows- Adding pillows to your classroom gives students comfy areas to sit and adds some coziness to your classroom. I love these pillows from Lakeshore Learning! They are great because they are easily cleaned and wiped off. (You know all about the germs that float around our classrooms!) The health inspector especially liked these pillows that weren't made of regular fabric =) I use these at my listening center so that students can sit and enjoy listening to a good book! I also had these donated to my classroom through DonorsChoose.org!


8. Plants- (Please don't mind the SOLO cup and label!) Plants are a great way to teach your students to take care of something and be responsible. They also enhance your classroom's appearance! This is actually a picture of a plant that we used during a science experiment, but if you look at the picture of the classroom curtains above, you will see the red pots that I use to hold our classroom plants. I just bought cheap clay pots and spray painted them red to go with my classroom. We have a classroom job called the "Plant Caretaker" who is charge of watering the plants each day. They love taking care of these and the plants just add a nice touch to the classroom.

Well that's about it! I know that you may not be able to do some of these ideas due to rules at your school (such as hanging things from the ceiling) but I hope this gave you some ideas for adding some coziness to your classroom! I will be posting more pictures of my classroom as I continue to work on it (there is still a long way to go!)

Have a great Thursday everyone!


Thursday, July 26, 2012

Fourth Grade Common Core Posters and Tell Me More Linky!

Calling all fourth grade teachers! I've finally completed the Fourth Grade "Kid Friendly" Common Core Standards Posters. I have had many requests for these and have been working on them for quite some time. I am exited to share them with you!


These 4th grade common core posters are unique due to the fact that the standards cards are two-sided: one side is the exact standard written and coded for your records, the other side is the same standard written in "kid-friendly" language so that your students will be able to understand what it is they will be learning. (NOTE: I've taken great care in trying to preserve the meaning of the standard when I changed it into terms that the students can understand. I kept most verbage the same and used synonyms for more challenging words to help fourth graders understand!)

This document includes ALL standards for Language Arts (reading, writing, language, etc.) and Math.

Also included are subject heading cards for your display, information explaining how to read the coding on each card, and directions on how to print and make the cards. Making the cards is very simple-- you just need to print, cut around the solid black line (but DO NOT cut the line in the middle) and then fold in half. One side will be the "teacher" side and the other is the "kid-friendly" side. Just laminate, if you wish, and display in your classroom to make the learning goals more visible to your students!

Two different options for display include:

#1) On a hanging ribbon- just use velcro to change out the cards each day to align with what you are teaching.


#2) In a pocket chart- these cards will fit in virtually all pocket charts. No need for velcro, just change them out daily!


Check them out... Click {here} to be taken to the link! I hope these posters help you with the new transition to the Common Core!

......................................................................................................................................................................

Okay, on to something a little more fun! I am linking up with the fabulous Amy Lemons to share some quirky facts about myself! If you'd like to join in on the fun, just click the button below to link up!


Alright, here goes:

1. Growing up, I HATED being tall. I am about 5'10" and have recently embraced my height. I always felt like a giant (especially in middle school when the boys were about half my height!) but now I'm beginning to realize that being tall has its perks!

2. I am a Big Brother fanatic! I love the TV show and drop everything to watch it all three days of the week =) Now I don't go as far as watching the live feeds online like some people do, but I'm a pretty devoted fan of the show!


3. I have terrible eyesight! I thank God every day for contact lenses because if I had to wear my glasses, it would not be pretty... ha!

4. My favorite place to be is at my family's lake house at Seneca Lake. I grew up spending my summers on this lake. Three years ago, my husband proposed to me on the cliff at sunset. Ahh... I just love it!


5. I absolutely love reading! My favorite authors include Jodi Piccoult and James Patterson, among many others. This summer, I read a series of books that start with "50"... haha... very interesting reads to say the least!

6. I am a bit of a perfectionist... okay, maybe more than a bit! Since becoming a mom though, I've learned that things aren't always just so. I'm letting things go (you should see my house!) and realizing that those little things don't matter in the grand scheme of life =)

7. My hubby, Brandon, is the love of my life! Every day, I just can't believe how lucky I am to be married to someone so loving, helpful, and funny!


8. Okay, I have two loves of my life-- my son, Grady, is the best thing that ever happened to me. He makes me laugh every day and is such a joy!

Alright, that's it! I know this is the longest post ever so thanks for reading! Be sure to link up with Amy above =)

Have a great Thursday!


Tuesday, June 26, 2012

First Grade Common Core Standards Posters

Okay, first grade friends! I've finally completed the First Grade "Kid Friendly" Common Core Standards Posters. I have had many requests for these and have been working on them for quite some time. I am exited to share them with you!


These 1st grade common core posters are unique due to the fact that the standards cards are two-sided: one side is the exact standard written and coded for your records, the other side is the same standard written in "kid-friendly" language so that your students will be able to understand what it is they will be learning. (NOTE: I've taken great care in trying to preserve the meaning of the standard when I changed it into terms that the students can understand. I kept most verbage the same and used synonyms for more challenging words to help first graders understand!)

This document includes ALL standards for Language Arts (reading, writing, language, etc.) and Math.

Also included are subject heading cards for your display, information explaining how to read the coding on each card, and directions on how to print and make the cards. Making the cards is very simple-- you just need to print, cut around the solid black line (but DO NOT cut the line in the middle) and then fold in half. One side will be the "teacher" side and the other is the "kid-friendly" side. Just laminate, if you wish, and display in your classroom to make the learning goals more visible to your students!

Check them out... Just click on the picture above to be taken to the link! I hope these posters help you with the new transition to the Common Core!


Monday, April 2, 2012

Customized Common Core Posters

I've had many requests for customized common core standards posters, so I decided to create these for 2nd and 3rd grade. These posters contain all standards for Language Arts (Reading, Writing, Language, etc.) and Math. I will also create Science and Social Studies posters to match your state standards in these areas. For more information, click on the pictures below!

2nd Grade Common Core Standards Posters:


3rd Grade Common Core Standards Posters:

Monday, March 19, 2012

Number of the Day Poster

So my students are starting to get bored of our calendar routine (we do this before math each day) and, to tell you the truth, so am I! I started thinking about how I could spice it up and make it a little more meaningful and then stumbled upon the idea of having a "number of the day." I created this poster to use every day before math to help get my students warmed up and ready to learn. Click on the picture below if you'd like the free document and directions on how to make the poster!


Enjoy! I hope you had a great Monday =)